|


|
|
Your GoalsGuy Countdown Clock has been factory preset for demonstration purposes only with an arbitrary future date that you’ll need to change. To personalize your GoalsGuy Countdown Clock, you’ll have to set the clock for BOTH the current date and time, and the future date. Setting your GoalsGuy Countdown Clock is very easy process. Follow each step as outlined. 1. On the back of your clock are four buttons marked MODE, S1, S2 and S3. These buttons are used to enter the dates and times. Setting your Countdown Clock is really very easy so, if you're ready, let's begin. Please note that your Countdown Clock has been factory preset for demonstration purposes only with an arbitrary future date which you'll need to change. Setting Your Countdown Clock For The Current Date and Time 1. Press the MODE button until the word "Clock" appears in the upper right hand corner of the display. 2. Press the MODE button once more. The word "Clock" still appears and you can now set the current time. Note that the indicators "Hrs", "Min" and "Sec" are flashing and will continue to flash for one minute. You must begin to set the current time while they are flashing. If they stop flashing, simply press the MODE button once again. 3. Press the S1 button to set the current hour. Note that each press of the S1 button advances the time by one hour. If you press and hold the S1 button for two seconds, the hour will advance at a faster rate. This rapid advance feature also works for the S2 and S3 buttons. The "PM" indicator will appear in the lower left corner of the clock display as you advance the hours past 12 noon. The absence of "PM" in the lower left corner indicates "AM". 4. Press S2 to set the current minute. 5. Press S3 to reset the seconds to zero. 6. Press MODE once again to enter the date setting. 7. Press S1 to set the current month. 8. Press S2 to set the current day. 9. Press S3 to set the current year. 10. Press the MODE button to advance to the countdown mode. If desired, when in clock mode, press the S1 button to choose between a 12 hour or 24 hour expression of time. In 24 hour mode a small "24" appears in the lower left corner of the clock display. In 12 hour AM/PM mode, nothing is displayed in the lower left corner. You may prefer to use a 24 hour clock with the hours from 1 in the morning until 12 noon expressed as 1 through 12 and the afternoon and evening hours expressed as 13 through 24. For example, 6:30 PM is expressed as 18:30 in the 24 hour mode. Setting Your Countdown Clock For Your Future Special Date 11. Press and hold the MODE button for five seconds. Note that when the display is in the countdown mode, the word "Clock" does not appear in the upper right corner of the display. The indicators "Month", "Day" and "Year" will be flashing. Set the month of your milestone date by pressing S1, the day by pressing S2 and the year by pressing S3. Note that the clock will return to the current date mode if you wait too long to set the milestone date. If this happens, press and hold the MODE button for five seconds until the indicators "Month", "Day" and "Year" are flashing. 12. Press the MODE button once again and your Countdown Clock will be in counting down mode showing the time remaining to your special future date. To display the current date and time, press the MODE button once again. By using the MODE button, you can always switch between the countdown display and current date/time display. Time Adjustments Along The Way...From Time To Time All fine digital clocks tend to lose or gain a few seconds every month. You may want to adjust the time (seconds) to be more precise. When you find it necessary to make these fine adjustments, please refer to the instructions (steps numbered 1 through 13) for setting your Countdown Clock. Changing The Battery Your Countdown Clock is powered by a long life lithium battery which should last for several years. However, if battery replacement is required (the Countdown Clock's display will be blank), follow these directions 1. Using a small Philips head screwdriver, remove the two small screws that secure the back plate of the clock. 2. Carefully remove the dead battery and replace it with a 3 volt lithium cell (Sony CR2025, Panasonic BR2025, Everready ECR2025 or equivalent lithium battery designated as a 2025). 3. Reposition the back plate and secure with screws. 4. Reset your Countdown Clock. At The GoalsGuy, our goal is simply to help you achieve yours. If you would like to purchase an additional goal setting countdown clock, simply click on the image below.
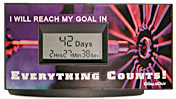
The Goal Setting Countdown Clock keeps you on focus, on target, on purpose. The clock turns anticipation into real and powerful motivation and guarantees a prominent position of importance on your desk or home office. As a gift, it's a great way to express your support for anyone you know who's striving toward an important goal.
|
|
|
